How to Install WordPress Plugins: Easy Methods for Beginners
As a WordPress beginner, one of the first things you probably want to do after launching a WordPress website is installing plugins. What are WordPress plugins? WordPress plugins are tools that enhance the functionality of your website. They are like the apps of your site, and they help you achieve different functionalities without writing any single line of code. Some popular WordPress plugins include Yoast SEO, Contact Form 7, Wp Forms, Wordfence, and Elementor.
Although there are 3 methods to install WordPress plugins to your WordPress website, this tutorial will only cover the first two beginner friendly methods. These methods should work for everyone except in only rare cases where there is an issue with the hosting. We will use the Contact Form 7 plugin for the tutorial.
Method 1- Installing directly from the WordPress dashboard
This is the easiest and the most beginner friendly way to install a WordPress plugin. It involves installing a plugin from the WordPress dashboard through performing a search. The WordPress database has more than 60,000 free plugins and they can all be installed through this method.
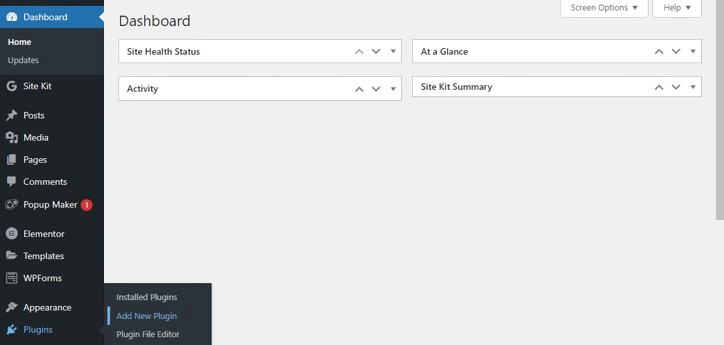
To install a plugin using this method, you have to be logged in to the WordPress dashboard. If you are not logged in, please do so using your admin username or email and password or through your hosting cPanel. After you are logged in, locate plugins, hover over it, and click on “Add new Plugin.”
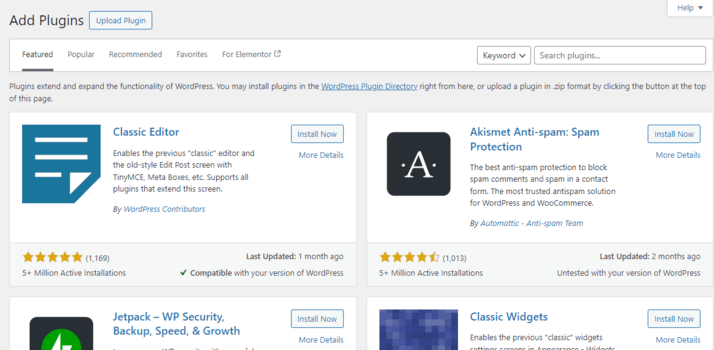
Once you have clicked on “Add New Plugin,” you will be directed to a page which looks like the one shown below. You can browse popular plugins or use the search bar to find a specific plugin.
Since in this tutorial we want to install the Contact Form 7 plugin, the next step is search the plugin using the search bar by simply typing the name of the plugin. After the search, the plugin will appear and then you can click on the “Install Now” button to install it to your WordPress site. After installation is complete, click “Activate.”
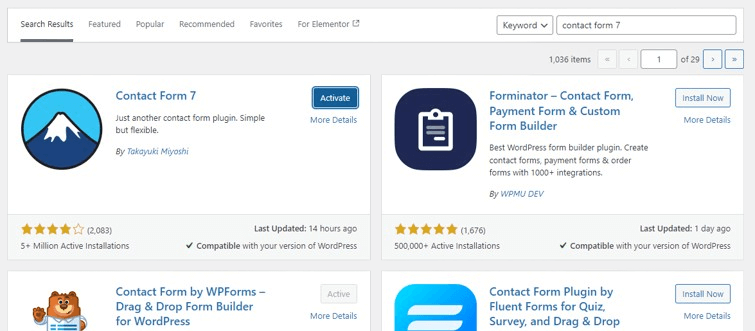
After activating the plugin, navigate to plugins> Installed plugins and now you can start using it. That’s it! You have installed your first WordPress plugin.
Need personalized help with your WordPress site? Get in touch now for a quick fix.
Method 2- Manual upload
This method is useful for installing plugins that are not available in the WordPress plugin directory or premium plugins downloaded from a third-party source. The first step in this method is to download the plugin from the developer’s website. The plugin is normally downloaded as a .zip file.
After downloading the plugin, go to your WordPress dashboard and repeat the “Add New Plugin” process we used in method one. However, for this method, do not search for a plugin or browse the featured plugins. Instead, navigate to the “Upload Plugin” button on the top left. After clicking on the button, you should be directed to this page.
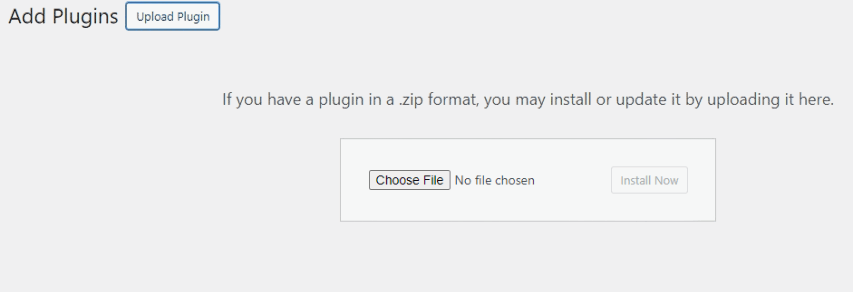
On this screen, click on the “Choose File” option to upload the plugin you just download from the developer’s website or any other provider and proceed to “Install Now.” You will be directed to this page.
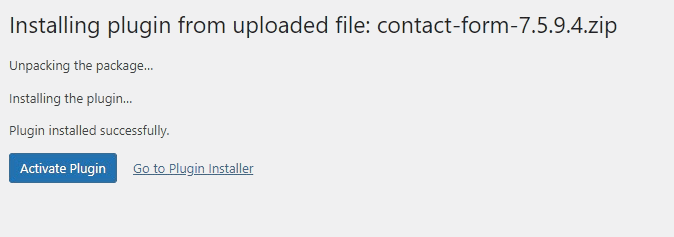
Click on the “Activate Plugin” button and that’s it. You have finished installing your downloaded WordPress plugin.
Navigate to the “Installed Plugins” page and start using your plugin.

