

How to Add Menu Badges in a WordPress Website: An Easy Guide
In the world of WordPress websites, grabbing the user’s attention and effectively communicating your message is crucial. Menu badges are a fantastic way to achieve this! They add a visual element to your menus, highlighting important pages or promotions, and ultimately boosting user engagement. Studies have shown that visual cues make interfaces user-friendly by guiding users through the interface, making it easier to navigate and interact with.
This easy-to-follow guide will walk you through adding menu badges to your WordPress website, step-by-step. So, get ready to take your website’s navigation to the next level!** At the end of this tutorial, your menu items should look like this or something similar depending on how you customize them.

Step 1: Adding a CSS code to our theme
The first step to achieving menu badges in your WordPress website is adding a few lines of CSS code to your theme. How you do this will depend on the theme your website uses but popular WordPress themes such as Astra, Kadence, Theme Forest, and Bloscky have this feature. Our website runs on the Kadence theme so we will use this for this tutorial.
So in your WordPress Admin dashboard, navigate to “Appearance” and then click on “Customize.” This should take you to a new Customize page with a link that looks like “yoursite/wp-admin/customize.php?return=%2Fwp-admin%2F.” In this page, look for “Additional CSS” or a similar option and click it. It should open a code editor field where you can add a code.
Image Illustration
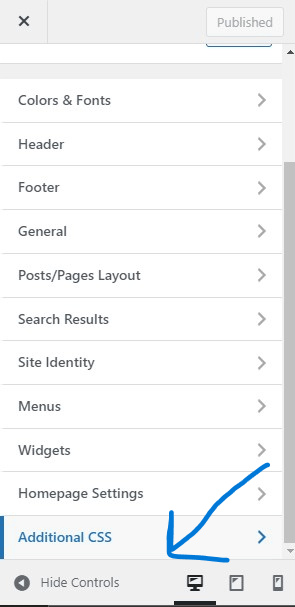
The next step will be adding these codes to the additional CSS field.
Additional CSS Custom codes
.menu-badge {
	font-size: 9px;
	margin-left: 4px;
	position: relative;
	top: -10px;
	margin-bottom: 13px;
	color: #ffffff;
	background-color: #FF0000;
	padding: 3px 4px;
	border-radius: 3px;
}
This is the Custom CSS for the badge. With this code, you can add menu badges to your menu already.
However, if you look at our primary menu. You will notice that the “Hosting” menu item badge has a bouncing animation. If you want to achieve this too, you can add the following code under the code above.
.badge-bounce {
	animation: bouncing .8s cubic-bezier(0.1,0.05,0.05,1) 0s infinite alternate both;
}

@keyframes bouncing{
	0%{top:-6px}
	100%{top:-10px}
}
Step 2: Entering the code next to the menu item
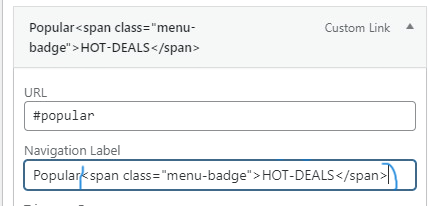
Now that you have your menu badges code set, the last step is to assign your menu items the badge functionality. Go back to your Admin Dashboard and navigate to “Appearance” and then “Menus.” If you do not know how to create WordPress Menus, check this step-by-step guide. Assuming that you have your menu set, expand the menu item you want to place a badge on and add the code below to your “Navigation label” and then click on “Save Menu.”
<span class="menu-badge badge-bounce">HOT-DEALS</span>If you do not what the bouncing animation, then you can delete the “badge-bounce” from your code so it looks like this.
<span class="menu-badge">HOT-DEALS</span>For instance, if your menu item is “Popular,” this is how you should do it.
Of course you will want your menu badge to read something else other than “HOT-DEALS.” To achieve this is very simple. Just replace the “HOT-DEALS” text with what you want your badge to read. And there you go, you have just learned how to create menu badges in WordPress.
You can also play with the CSS code to adjust anything you need to, such as the color, margins, and the font size. For instance, to change the menu badge from red to green color, you would have to change the “FF0000” color code to “008A00.”